
Thankfully since this blog post there is finally an easier and better way. You don't need Step 1 or Step 2 below. Instead, just use mkcert. Note: if you use Firefox on Windows please see my tip (just before Step 2 below). Step 4 is still useful if you use XAMPP because I show you how to use SSL certs with XAMPP.
Before we start, if you’re wondering the relation of this post to the header image, basically, that’s how I felt when I finally figured this out, after a long long time of trying and failing. Hopefully you will feel the same jubilation! Anyway, let’s dig right into this…
Judging by what I’ve seen on the web, there seems to be a lot of people struggling with how to setup proper SSL/HTTPS on their local dev setup in Windows. A lot of information that I came across was either out of date or incorrect, so I’m hoping this clears that up as well. Worst of all, where good help is posted online, it is for Mac only. 🙁 That is frustrating when the vast majority of developers worldwide are Windows users (see Stack Exchange annual survey), so I’m hoping to help out all those Windows devs.
A few key notes before we start. This will help any Windows 10 based developer. It shouldn’t matter whether you are using XAMPP, MAMP, or WAMP (or maybe even other options too). Note, I will be using XAMPP for my examples at the end. The only requirement is you’ll need to have enabled WSL, but that’s just a good idea for any Windows based developer.
If you also want easy and worry free SSL setup for your live / production server, then I highly recommend Cleavr. Check it out right now!
STEP 1 (only needs to be done once)
S1 – Part 1
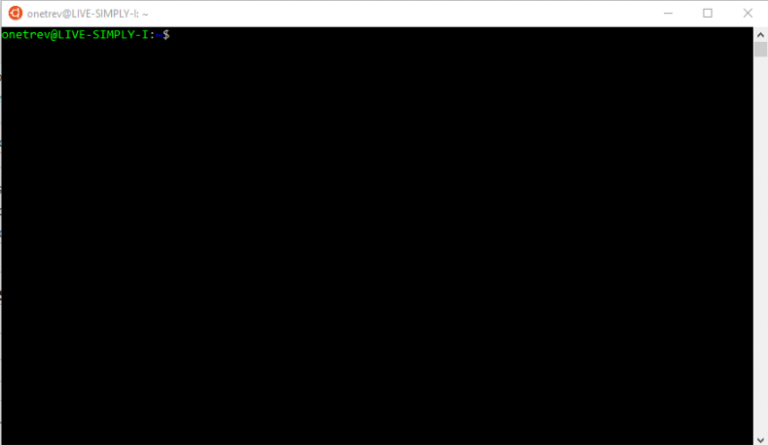
You need to become a Certificate Authority (CA). Which is both cool and awesome. It’s also easy to do. Start by firing up WSL (launching Linux distribution app of your choice, I like Ubuntu). Note: if you think this stuff below is a lot of work, remember Steps 1 and 2 only need to be done once. Check out how easy and quick Step 3 is once your are up and running.
You should now be in a window that looks like this (Ubuntu app pictured below).
Now we need to do the following two commands (one at a time please):
mkdir certs
cd certs
You should now be in your “certs” directory, we need to make ourselves a Certificate Authority (CA) like so:
openssl genrsa -des3 -out myCA.key 2048You’ll be asked to create a pass phrase. It’s probably a good idea to make one, just to be safe. After that, fire off this command.
openssl req -x509 -new -nodes -key myCA.key -sha256 -days 1825 -out myCA.pemAt this point you’ll have to enter the pass phrase you just created, then you’ll be asked to answer a bunch of questions. You don’t really need to answer any of them, but since you only have to do this once, might as well make ourselves feel like legit CA’s and enter in accurate info. The most important detail you’ll enter is the value for “Common Name” since that is what you’ll look for in your root Certificate Authorities if you ever need to find / remove this certificate.
Awesome! You are now a hack/local CA! But don’t celebrate (too much), two more things need to be done before this step is done with forever (well for 5 years until your certificate expires).
S1 – Part 2
What we have to do now is install our root certificate we just made so browsers trusts us to sign SSL certs for our local domains. We have a tiny problem though, the two CA files we just created, myCA.key and myCA.pem, are on our WSL file system and copying files between file systems is I believe a big no-go zone. But a simple copy and paste will fix us up no problem. So back to our WSL app and fire up a Linux text editor like so:
nano myCA.pemSelect and copy all the text here, then paste it into your code editor in Windows. Then let’s save this file out to where we’ll want to be saving all our certificates later. I personally like this path below. But it’s important the location is something under your Windows user folder so WSL can safely write/read the files.
C:\Users\%yourUserFolder%\.localhost-ssl
Now do the same procedure for your “myCA.key” file.
TIP -> to create a folder / file in Windows with a dot in front of the name, simply add a period at the end when creating the folder / fill. EX: .localhost-ssl. Once you hit enter the trailing dot will disappear and you’ll magically have a dot prefixed folder / file.
S1 – Part 3
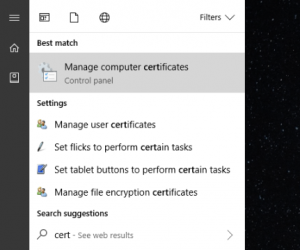
Now we are actually going to install this certificate. This is really easy to do in Windows. Type “Cert” on the start screen and you should be able to launch the Windows Certificate Manager.
Go to Trusted Root Certification Authorities and right click to Import your certificate. You should end up here:
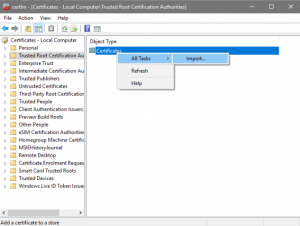
Click Browse. Be sure to change file type you are looking for to All Files (.). Find and select the myCA.pem file we just saved somewhere in your Windows file system. Proceed on through and boom, you are now a (local) trusted CA! Hooray! Except………….
Firefox. I love you. However, in this case you are not making life easy. For those who use Firefox or are testing with Firefox, then this is what you need to do to wrap up Step 1. The problem is Firefox does not use Windows’ certificate store by default, so the certificate you added above has to be manually added into Firefox. You have two options how to proceed, but you may want to also read more information about it.
- Go to
about:config, search for “security.enterprise_roots.enabled” and change to true and restart Firefox. This adds support for finding stored certificates. - Or… You can just enter this in your address bar
about:preferences#privacy, go to View Certificates at the bottom of the page and under Your Certificates, import the same myCA.pem file you just did above.
STEP 2 (only needs to be done once)
Alright! Good news, we’re getting close! We need to head back to our WSL app, and enter the following command:
nano ssl.sh
Then simply copy and paste in the script below to this bash script file. IMPORTANT: /mnt/c/Users/onetr/.localhost-ssl/ must be changed to wherever you want to save your certificates, the folder we setup earlier.
#!/bin/bash

if [ "$#" -ne 1 ]
then
echo "You must supply a domain..."
exit 1
fi

DOMAIN=$1

cd ~/certs
openssl genrsa -out /mnt/c/Users/onetr/.localhost-ssl/$DOMAIN.key 2048
openssl req -new -key /mnt/c/Users/onetr/.localhost-ssl/$DOMAIN.key -out /mnt/c/Users/onetr/.localhost-ssl/$DOMAIN.csr

cat > /mnt/c/Users/onetr/.localhost-ssl/$DOMAIN.ext << EOF
authorityKeyIdentifier=keyid,issuer
basicConstraints=CA:FALSE
keyUsage = digitalSignature, nonRepudiation, keyEncipherment, dataEncipherment
subjectAltName = @alt_names

[alt_names]
DNS.1 = $DOMAIN
EOF

openssl x509 -req -in /mnt/c/Users/onetr/.localhost-ssl/$DOMAIN.csr -CA myCA.pem -CAkey myCA.key -CAcreateserial \
-out /mnt/c/Users/onetr/.localhost-ssl/$DOMAIN.crt -days 1825 -sha256 -extfile /mnt/c/Users/onetr/.localhost-ssl/$DOMAIN.ext

rm /mnt/c/Users/onetr/.localhost-ssl/$DOMAIN.csr
rm /mnt/c/Users/onetr/.localhost-ssl/$DOMAIN.ext
Save the file. Now we just have to make this file executable like so:
chmod u+x ssl.sh
Then you need to copy the file to /usr/local/bin/ with the following command:
sudo mv ssl.sh /usr/local/bin/ssl.sh
Note: you need root privileges to move this file to this location (which is why we need to add sudo command), so it’ll probably ask you for your WSL password. If you set a password, hopefully you now remember what it is!
And that’s it for the one time only setup tasks. We now ready for Step 3, which is the only thing you’ll need to regularly do. Best of all this step is VERY easy because of all the work we just put in.
STEP 3 (it’s action time)
This step is rather anticlimactically easy. It may be hard to believe but this is now all your need to do.
In your WSL app, simply enter this command (replacing your.localhost with whatever localhost domain you are using):
ssl.sh your.localhost
You can just hit enter rapidly through all the questions you are asked, none of these really matter now that you aren’t importing this certificate (since you are the CA). After a bunch of questions you’ll finally hit the final one where you have to put in the pass phrase you used when created your CA key in Step 1. And that’s it. You’ve now just created a SSL certificate, signed by you, your very own trusted local Certificate Authority, so all browsers will trust it!
STEP 4 (using certs with XAMPP)
Now we just need to reference the certificate and key files in whatever you are using for your local Apache setup. This is where I can’t show you all the options, it’s up to what you are running. I will just demo what I do for XAMPP. But for MAMP, you’d just simply go and select the certificate and key files for the domain in the MAMP GUI for that domain you are settings up for HTTPS. Back to my XAMPP example, see below for what I do. Note I have “localhost” setup for SSL as well as it's needed for the BrowserSync tip below. Find your vhosts file, which should be here: C:\xampp\apache\conf\extra. Then set it up similar to what I have below:
# Virtual Hosts
#
# Required modules: mod_log_config

## Some initial housekeeping - set to directory you have your vhosts in -----------
<Directory C:/websites>
AllowOverride All
Require all granted
</Directory>

## Default host path --------------------------------

NameVirtualHost *:80
NameVirtualHost *:443

<VirtualHost *:443>
DocumentRoot "c:/xampp/htdocs"
ServerName localhost
SSLEngine on
SSLCertificateFile "c:/Users/onetr/.localhost-ssl/localhost.crt"
SSLCertificateKeyFile "c:/Users/onetr/.localhost-ssl/localhost.key"
ErrorLog "logs/localhost-error.log"
</VirtualHost>

## Virtual Host Setup Below -------------------------

<VirtualHost *:443>
DocumentRoot "c:/websites/tester"
ServerName tester.localhost
SSLEngine on
SSLCertificateFile "C:/Users/onetr/.localhost-ssl/tester.localhost.crt"
SSLCertificateKeyFile "C:/Users/onetr/.localhost-ssl/tester.localhost.key"
ErrorLog "logs/tester-error.log"
</VirtualHost>

<VirtualHost *:80>
DocumentRoot "c:/websites/wpdev"
ServerName wpdev.localhost
</VirtualHost>
A couple of things to note. I think this vhosts setup is really simplified from other example, so it’s very easy to work with. The key parts for SSL are ensuring you have NameVirtualHost *:443 and that for any virtual host domain you are creating, you need everything between the <VirtualHost *:443> statements. The key thing to notice is that with each domain you need to update the statements to point to the certificate and key for the particular SSL certificate you’ve created for that domain.
Now simply restart Apache, navigate to whatever your URL is, i.e. https://something.localhost Be sure your URL has HTTPS in it! You should now see…
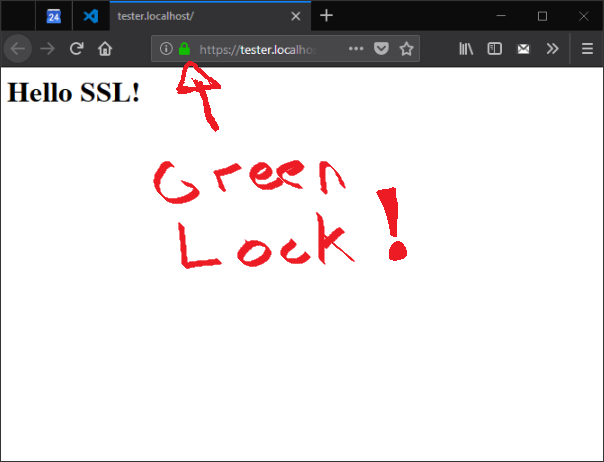
Yep, all this work for a little green lock! Well actually that green lock is important and useful, and was well worth the trouble I think.
BONUS STEP (HTTPS with Webpack + BrowserSync)
If you’re still here or just here for this tip, there’s no time to waste. Let’s get this done…
First up, because we have a sweet CA setup, we can just go ahead and make a certificate for "localhost", since BrowerSync URLs are things like: localhost:3001
Now just pop back into your WSL app and fire off this command:
ssl.sh localhost
That creates the localhost certificate for you. Then add the following code below to your BrowserSync setup and adjust the proxy URL as applicable, insuring it has a working certified HTTPS local address. Something like this:
proxy: "https://tester.localhost/",
https: {
key: "C:/Users/onetr/.localhost-ssl/localhost.key",
cert: "C:/Users/onetr/.localhost-ssl/localhost.crt"
},
Notice that we’ve added the https option to BrowserSync and are pointing to the new localhost certificate and key we just created. That’s all you have to do! Best of all, since all your BrowserSync URLs are at localhost:some-port-number, you never need to create a certificate again since it’s only ever the port number that changes.
PS: If you want awesome value developer focused web hosting, say no to AWS, and instead go to Digital Ocean and get your droplet on!